photo 3am_home_1_zpsd47b2810.png photo 3am_MJ_1_zpsdb43188f.png photo 3am_TS_1_zps32b65946.png photo 3am_NL_1_zps4f84c04a.png

Spring Addition/Subtraction Freebie

Ok, so I'm technically breaking a Blogging 101 rule - NO DOUBLE POSTING!!! Yes.... actually this is my 2nd post today but trust me when you see this FREEBIE by Tessa from Tales from Outside the Classroom you will forgive me. :0) 

If you are like me.....and are in the "End of Year Crunch" - you need something academic yet fun to keep your kiddos brains busy.....Well, check this out!!

 You can download it for free by clicking on one of the images.


I downloaded my own and my kinder kids LOVED LOVED LOVED them. I used them for morning work and the kids didn't want to put them away! Now, that's the kind of work I like giving!

In fact, if you like the addition ones above - just check it out - Tessa was super sweet and made matching subtraction ones too! Now that is sure to keep your little ones busy over these last exhausting days at school! CLICK HERE TO GET THE SUBTRACTION SET


 If you like these FREEBIES - please make your way over to Tessa's blog.... She is super talented and I always find the greatest stuff over there at Tales from Outside the Classroom - she's definitely on my FAVS list!

Tessa Maguire is a former reading teacher and differentiated instruction coach.  She currently is in a dual role administration and curriculum coaching position. She spends her days helping her K-3 teachers find what works best for them and their students. She blogs about the resources she finds and creates and she shares tips and strategies for effective instruction.  You can find out more information on her blog Tales from Outside the Classroom http://talesfromoutsidetheclassroom.blogspot.com


Decorating Plastic Drawers

I hope everyone is having a tremendous Memorial Day weekend. I know I am busy relaxing...:0)

I wonder if you've seen this little gem floating around Pinterest:


Is this drawer set not the cutest thing ever???! I adore it...and what a perfect fit for a primary -- or even not so primary classroom!

My friend, Maria from Kinder-Craze created this and has given you directions on how to make your very own.......Oh come on.....you know you NEED it! :0)

Hop over to Kinder-Craze to check out her post and while you are there, I found another fantastic post she wrote that I'm super excited about....
Maria shows us how to make a composing/decomposing numbers chart using post-its (Why in the world didn't I think of that??) This is a lesson I will definitely use in my kinder room.

Anyhoo - I hope you hop over and check out this great, new teacher-blogger! 

Writer's Workshop

The one thing I've learned about Writer's Workshop is that when people talk about it - they often mean entirely different things. Writer's Workshop can look completely different in classrooms depending greatly on the teacher's philosophy on teaching writing.... I know this because I myself have moved from one side of the continuum to the other throughout my teaching career.

Prior to about 3 years ago, I taught writing based largely on prompt writing activities. All the writing my kids did was in response to something I asked. I spent time modeling how to master the mechanics of writing (capitalization, punctutation, etc.) and the best way to "respond" to a written prompt. And yes this is a VERY tempting avenue - especially when we are faced with high stakes testing in which kids MUST write in response to a prompt.

However, about 3 years ago I was introduced to Lucy Calkins' Units of Study K-2 and that is when my own Writer's Workshop began to transform. 


Now coming from a teacher that was very prescriptive, it wasn't always an easy transition. However, I am happy to say that I am NOT the writing teacher I used to be. I'm not saying there's never a time for using prompt writing response activities. I think there is definitely a time and place for that sort of practice and reflective thinking. However, I do believe if we teach children to write the stories that are in their hearts and souls on a daily basis - they will be able to attack any response writing activity that comes their way. I have watched my students' writing grow by leaps and bounds. In fact, my kindergarteners write as well as the 2nd graders I used to teach (that is a bit embarrassing to admit). The style of writing instruction that Lucky Calkins' advocates really works!  So, I wanted to give you a peek inside my classroom during Writer's Workshop.

At the beginning of the year, I use LOTS of time pumping the kids up for this special time. I really make a big deal about being writers and how all of us are writers with stories to tell. I take reluctant writers and "prove" to them that they have amazing stories to tell/write. And, once they are empowered with that belief - amazing writers is exactly what they become!

I use music to signal nearly every part of our school day. And, Writer's Workshop is no exception. I use beautiful, calm music that the kids fall in love with. Many teachers use classical music. I do NOT because I find it tends to help little ones fall asleep to easy :0) So, I use soft music that is also catchy...These songs become the mantra of our Writer's Workshop time for the entire year.

In addition to music, I also turn half the lights out and use lamps instead - it really helps to set the tone for a quiet, peaceful writing time. And, it's a time the kids REALLY enjoy - they do not like missing Writer's Workshop time. :0)

 Kids choose their perfect writing spot.... We are usually laid out all over the room. They take their writing folders (or composition books during the last month of school) along with their crayons and pen to a place in the room where they sit or lay down to write.

Yes......you heard me correct! My kids write with pens - not pencils. The reason is two-fold.
1. I don't have to sharpen pencils :0)
2. The focus is on getting our ideas/stories on paper - not perfection. There is no erasing...or throwing paper away... we do our best work! If we mess up we draw a line through it and keep right on going!


The picture above shows our "showcase" at the end of Writer's Workshop. This is a time when the kids return the carpet and sit in a circle with their writing. Then, when we say "Showcase" everyone shows off their writing job! They are so proud of the writing they do - especially by the end of the year. After "showcase" comes the time when they "turn & talk" about their story with someone sitting beside them. 

**You may notice they are using composition books in these pictures. For the majority of the year they use basic writing paper (from the Lucy Calkins' Units of Study CD). However, the last month of school, I have them use the composition books. By now their writing has grown so wonderfully I want them to refer back to it during the summer and continue using the composition book during summer to write. It's sort of a rite of passage :0)Trust me, they remember those special stories they wrote the last month of school and it helps them take school memories home. :0)

I hope you enjoyed this peek inside our Writer's Workshop. Please leave a comment below and tell me about yours or any questions or concerns you have about Writer's Workshop!
Guest Post - Mrs. Stanford's Class

Hello everyone, Jessica from Mrs. Stanford's Class guest blogging here!
MrsStanfordsClass
I'd like to start off by thanking Jeannie for this exciting opportunity to guest blog for the very first time! Ever since I contacted her about being a guest blogger I've been racking my brain about what to write. So I've decided that I'm just going to invite you into my classroom and introduce you to my obsession love for DonorsChoose! Hopefully after seeing my classroom some of you may get ideas that you haven't had before or maybe some will create projects to bring amazing materials to your kiddos too! So here we go....I am a 5th year kindergarten teacher and love every minute of it!
click to pin
I was blessed to move into a large room this year (my original room was no bigger than my master bedroom... eeek). My students now have the opportunity to travel to  more workstations than they have been able to in the past.
click to pin You may be wondering what I'm doing with all of those orb looking things all over their tables... those are their amazing ball chairs! I love how exciting they make my classroom. A few years back I was in dire need of some sort of therapy for a few of my severe ADHD students. After much research I decided to order a few and now they are so wonderful I have a whole class set! If any of you are interested in checking them out they were ordered from School Specialty
click to pin When it comes to technology, I am a junkie! My students absolutely love our listening workstation. It's so bad that I have to beg them to stop reading so that we can get to lunch. I currently have it set for 4 students and the choice of about 100 books. All cds have been loaded to their iPod Nanos and students just have to search for the cover of their selected book. (Beats the old cd player with 4 sets of headphones that I was constantly resetting during reading groups)   
click to pin As for our library workstation, I have encouraged the students to read sight word books during their visit. Students then practice until they are ready to read them to an adult.
click to pin
click to pin  After the students read me their book of choice, I snap a quick photo of them and their book to present to parents. We have created a wall of fame in our hallway to show the parents the books that they are able to read indepentently. Since we have created the wall of fame, more than 3/4 of my students have doubled their book logs!
click to pin
click to pin  Workstations are dandy, but what do you do when you hear the dreaded line "I'm done, what do I do now??!" Well I've mastered it this year! When students have completed their work early or just have a few extra minutes in their day I encourage them to grab either a tag reader or a file folder game from the shelf. Students are excited to use these tools and are building much needed literacy and math skills while 'keeping busy' during those few extra moments in their day. I have the books and trays leveled and students are aware of the tag caddy/tray color that they should choose.
Well we have many more workstations in our classroom, but I thought I'd give you a sneak peek at my favorite! Everything (and I mean EVERYTHING) that you have seen has been donated through DonorsChoose (they are oh so amazing!!) If you have any questions or need help creating a project, let me know and I'd be more than eager to help you, help your kiddos!!
Thanks again to the AMAZING Jeannie for this opportunity!
Blessings,
Jessica
Come visit me :)

Graduation Invitations and Caps


Our time is winding down for this school year (yeah I know some of you lucky ducks are already out--- don't even talk to me :0) I've had the privilege of having the MOST wonderful class EVER! Although I am as ready to be done as anyone -- I know I will truly miss this group. It really has been a "Once-in-a-Teaching Career" kind of group!

Anyhoo - I'm getting some finishing details done for our special kindergarten graduation and I am in LOVE with them. The picture above shows our invitations! I personalized each invitation. What a great keepsake for parents....and I rolled them up with ribbon -- the kids thought that was awesome.....so hopefully the invitations made it home for mom and dad to see. :0) Click HERE to get my FREE KINDERGARTEN GRADUATION INVITATIONS.

Along with our invitations, we've been working on our graduation caps too!

I use the graduation cap kit from Really Good Stuff . They are $4.99 for 12 caps.
I then have the kids color them VERY HARD with rainbow colors. I don't really explain why - I just show them later!. I go back over and paint them with black tempera paint. Once they are dry I scratch their names on top! The kids oohhh and aaahhh over them and they are always surprised that their names are in rainbow colors - each one is different because they all use different colors in different patterns. We paint the strip also - and I let the kids scratch the paint to reveal rainbow pictures underneath! They love this activity and what a great memory keepsake!


I'll be sharing some more pictures in the week to come! :0)

Journaling Amongst the Common Core Writing Expectations


Writing in the Common Core has changed a bit and it has become important to instruct students on specific genres and styles of writing.  However, I think it’s important for students to be able to have an outlet to freely express themselves through writing as well.  How are we as teachers supposed to give all the instruction that is needed and still allow students the opportunity for expression and exploration?  I'm Melissa from Dilly Dabbles and here are a few “aha’s” that I’ve had this year about how to keep the less structured writing in my classroom.

1.  Give your students a journal.  A journal is a place where students can write freely.  The topics are never assigned and students may write in it throughout the day.  You will have a time during the day that will work best for you to dedicate 5-10 minutes to journal writing.  The first thing in the morning as students were coming in is the time that worked best for me.  Always allow just a couple of minutes at the end for 1-2 students to share.  Students who have an audience write much higher quality work.  The sharing also gives other students ideas that they might write about.  Have a place in the back of the journals for students to record ideas that come to them that they’d like to write about. 

2.  Don’t tell the teacher, tell your journal.  Journals also become the place where students can “tattle” or tell you a story they are dying to tell you at the most inopportune time.  When this happens, politely tell students to record it in their journal.  You may want to set up a system where you read 5 journals every day or some similar system that works for you.  (Set up the guideline that you’ll only read them if the students want you to in order to establish trust.  This will likely not be an issue in the primary grades, but it gives students the message that you respect them and their ideas.)  Set the tone that journals can be written in at any time and also becomes an option for students who finish work before it is time to move to the next part of the day. 

3.  Be an example.  Show students that you’re a writer too.  Write a morning message to students each day.  It does not have to be an exercise in correcting grammar and structure!  That point was a liberator for me.  I strongly disliked doing a morning message each morning if it meant that I had to think of ways to purposely mess it up.  Simply make it a way to welcome your students to the day and show them you write and give them something to look forward to reading each day.  Begin your own journal, show it to students and occasionally share appropriate entries. (Or make up appropriate ones to share with students!)  Occasionally take some time while students are writing to also write. 

4.  What if a student says “I don’t know what to write”?  Have them write “I don’t know what to write.” over and over until they do know what to write or refer them to the ideas in the back of their journal.  Don’t give a prompt, that removes the responsibility from the student and trains them to rely on you. 

5.  What should you use for a journal?  There are many ways to organize your journals and many formats you could use.  No matter the format you choose, one key is that students have a way to personalize it a bit.  When students have some ownership and investment, they are more likely to value it, care for it and use it.  Here are some ideas:

                Give students a monthly journal.  This is often in the format of a packet of stapled or spiral bound pages that is used for a single month and replaced each month.  Students can personalize it with a picture on the cover and coloring the border.  These are nice because they are used for a short time and are not as easily lost or damaged in desks.  The drawback is that students don’t have them to refer back to throughout the year for reflection and elaboration.

                Give students a composition book.  Some schools may supply these, you may make them part of your back to school supply list or you may purchase them yourself very inexpensively at the beginning of the school year with back to school sales.  These are securely bound and come in options of wide ruled, college ruled and even primary ruled with dotted lines at the bottom and space at the top for a picture.  You could also use a simple spiral bound notebook, they just won’t hold up as well.  These can be personalized by having students design a cover that is glued to the commercial cover of the book.  To help younger students separate and organize entries, monthly divider pages could be glued in at the beginning of each month.  These are nice because they are well bound and will hold up to use throughout the school year.  The drawback is the potential expense.  Note that some students may need another journal if they are avid writers, so be sure to pick up some extra ones if you choose this route.
                Keep journaling in a binder.  Have paper that is prepared with 3 hole punches in a central location for students to get and use when needed.  Students then add the pages to a binder that is kept in a specific place in the classroom.  Students can personalize the binders with a cover that is decorated and slipped in the plastic cover of the binder.  These are nice because students can look back at all of their writing for reflection.  Students can add more pages if they desire to go back to previous entries to add to their writing and they can add pages to it throughout the year.  The drawback is that pages easily tear out, especially as students go back through it more or write on pages already in the binder. 

Keep these ideas in mind as you prepare for your class next year and hopefully a few of them will be helpful to you as you try to allow free writing amidst the expectations of the Common Core.  To help get you started, I have a set of free monthly journal covers for you.  They are in a full page size for the cover of packets or dividers in a binder journal.  You can copy/print them at a reduced size for use in composition books. 


Thanks so much to Jeannie for allowing me to be a guest on her wonderful blog!!
We’d love to hear in the comments below how you use or plan to use journaling in your classroom. 

~Melissa has been an elementary school teacher in several grades for the last 8 years, most recently teaching first grade.  She just moved positions to support teachers as an instructional coach concentrating on K-3 reading.  Melissa is the owner and writer of the Dilly Dabbles blog at www.dillydabbles.blogspot.com and website at www.dillydabblesdoodles.com.~

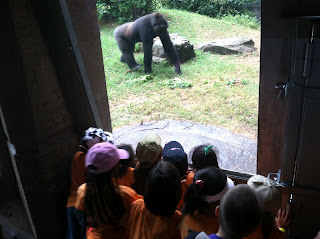
Zoo Trip

 Our annual kindergarten field trip to the zoo was last Friday and it was......well.....WILD!!
The kids had a ball and I must admit - I did too!


Kinder Addition

Hi everyone!  I am April from Wolfelicious.  I am so excited and nervous to be doing my first guest blog.  Thank you so much Jeannie for letting me post on your blog.

After thinking and thinking about what would be great to post, I decided to go with addition.  For kindergarten, the Common Core standards say the kiddos have to fluently add within 5.  Whoa, wait a minute, fluently add within five.  My goodness!  At first I thought that was going to be hard, but I have found out that the kindergarteners really think it is so cool to be doing addition and they are excited to practice and practice it.  I would like to share with you some of the things my students have done to help them become fluent with their addition facts within five.

First we completed our basal math series (Math Connects) on addition.  We (K teachers) don't feel the basal book practices addition enough for our students to really become fluent in it.  So, we have to add to the series.  I am sure most schools have to add to their basal books to get in everything they need to teach. 

Next I work on addition by having the students make the problem.
I pick a student to hold the addition sign and I pick another student to hold the equals sign.  Then I call students up to make the problems. This problem is 3 + 1 =
Then the students walk to the other side of the equals sign to get the answer 4.  The problem shows them that a part and a part make a whole. 

Then, I have the students go to different centers working on understanding how to make certain numbers.  The students use a variety of manipulatives to understand how many ways they can equal the same number.  Here are some pictures of some of my students working at their center.
Using beans to make 4.

Using unifix cubes to make 4.
Using pattern blocks to make a shape out of 4 shapes.

 Before we go to these centers, I copy packets for each student of the following pages.  I have a packet for numbers 4 through 10.  The students work at their own pace at the centers so I have some students who are working on 4's while others are at 5's or 6's.  I love that they are able to work at their own pace!  These activities really get the students to understand how to make the addition facts different ways.
Use pattern blocks to make a picture with the number you are working on.  Trace the pattern blocks. Color them.
Unifix cubes.

Beans

Use pattern blocks stamps to create a picture.

Jewels

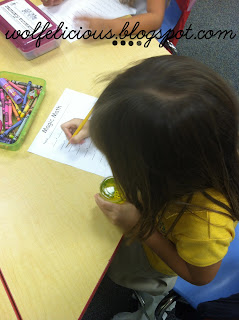
Magic Math
Doesn't the name just sound so exciting?  Well, you're right!  It is exciting.  I brought out my basket of baby food jars filled with colored water and 2 dice.  I showed the students the jars and told them how it is Magic Math.  I explained how they needed to use the jars.  They needed to shake the jars and then look at the dice.  One dice is one number and the other dice is the other number for the addition problem.  Then they add the two number together and they get their answer.  I made a Magic Math form and the students filled out the form while they worked.


 Here are what the jars look like.  Regular baby food jars fill with 2 dice and colored water.  I twisted on the lids and then went around the lid with a hot glue gun so they wouldn't leak.


3+3= 6

The students just love Magic Math.  I have included a Magic Math Freebie page for you so you can try this awesome way to practice addition with your kiddos.  It would even work for multiplication (you would have to change the form).  I hope you have found some new ways to teach your kiddos addition.  I have really enjoyed sharing with you.  Thanks again Jeannie for giving me the opportunity to be a guest blogger. 

Don't forget your freebie. Click the picture below and it will take you to Google Docs to download the freebie.


Reader's Theatre for Little Ones!

Hello to Jeannie and all her friends!  I'm Tammy from Forever in First, and I'm very happy to be here.  I hope by the end of this post that you'll be happy I'm here as well.      

Some kids just really enjoy a great readers theater moment.  You know the ones, right?  Without any inhibitions, their faces and voices are bursting with expression.  It's like they're without a care in the world.  They simply just love to read.  They make choosing a readers theater script simple, because they can make anything sound easy and enjoyable.  Then there's the group of struggling readers.  Picking a script for them is quite the opposite and sometimes impossible.  It can be frustrating.  Where are the scripts that are at their independent level?  

A few years ago, I realized that the scripts for these kids were right in front of my nose.  As a class, we learn a poem each week.  At the end of the week a copy goes into each child's poetry anthology that goes home every night.  My kids have numerous opportunities to become fluent with these poems at school and at home on a daily basis.  They know them inside and out, even the kids who struggle.  Here is where my epiphany took place.  Why not turn these poems into readers theater scripts?  

Here's the very first poem we learned in my class at the beginning of the year.


Here's how I turned it into a readers theater.  Easy cheesy.  

click on the pictures for your own copies
There are typically five or six readers reading in the same group.  It really doesn't matter if there are only two parts.  When two or three are reading the same part, that just means more support for those who need it.  Now their little faces and voices are more likely to experience the joy of reading without any inhibitions.

Thanks again for reading, and a big thanks to Jeannie for letting me hang out with you all.