photo 3am_home_1_zpsd47b2810.png photo 3am_MJ_1_zpsdb43188f.png photo 3am_TS_1_zps32b65946.png photo 3am_NL_1_zps4f84c04a.png

Oceans of Fun

Hi! I'm Kerri from Ms.Kerri and Her Krazy Kindergarten. I'm so excited to guest blogging over here. This is my first time to be a guest blogger. I've been racking my brain since Jeannie asked for some guest bloggers about what to blog about. I have some ideas of things I want to blog about but I'm afraid they might stir some things up and you don't want to do that at someone else's house. Then I thought about blogging about a new game that I'm working on for my class that uses a plastic bowling set from Wal mart. Then I thought about blogging about the new ipod touches I have for the classroom. But I finally decided to do a post on some ocean activities that we've working on.


We started by reading these two books. One was fiction and the other was non fiction.We discussed what it meant for a book to be fiction and non fiction and found interesting words. This is how I do my vocabulary instruction. Inspired by a workshop by Tim Rasinski. We harvest words from the text. The words they chose were seaweed, shark, kelp, crab, ocean. I put these on my interesting words wall. Then we practice spelling them and using them in our writing throughout the unit. They've since added foam, tides, and currents to list after a poem we read. After we read the books, I split the class into two groups. One group had paper that said the ocean is and the other had paper that said, the ocean has. They brainstormed and then worked on writing and drawing on these charts.
We read some other books about the ocean and animals that lived in the ocean. We made a list of these animals and they picked one to draw and label a picture of. We then talked about what facts are and they had to make a web of their animal and add facts to it. The last part is turn the web into writing and make the sea animal to go with it. We haven't finished this process quite yet. But you can check out my blog later for pictures of the final product.

The next part of our ocean unit was the Mystery Box. I bought this from Abby at The Inspired Apple. If you haven't checked this unit out you should. I've used to introduce several of our science units and the kids love it. I had put shells in the box and other things you find at the ocean. My clues were:
1. I live near the ocean.
2. I am many colors.
3. I am many shapes and sizes.
4. I am a home for animals.
One of my students guessed the ocean, which was a pretty good guess. After we examined the shells a little bit, I gave all them a shell and page to work on. The page has a box for each sense other than taste to draw and write about. Then a place at the bottom to write a sentence. This is where I messed up and now you get to learn from my mistakes. I went over the directions but didn't model enough. So the day they worked on this was disastrous. The next day I took a shell and modeled what I wanted them to do. They turned out a little better. Thinking about it now, I think I should have done this together.

Here are some examples of their work. My higher students got this with no problem. I probably could have let them go with it after the modeling and then worked through it with the other students.


Next week, one of the centers the kids will go to is a science center. I've been wanting to start this forever. So better late than never. I'm setting up all the shells and other sea life items on a table. They can explore the items with magnifying glasses and then record their observations on a sheet like we've already done in class. I hope I've given you some ideas for things you can do with an ocean unit or another unit of study in science. I think this method could be applied to any unit of study. I've got a freebie to share with you. The clipart on this sheet is from scrappin doodles.

Science Observation Sheet Thursday and Friday of this week we're going to be talking about the rain forest as part of Earth week. We're going to compare oceans and rain forests and write about our favorite. So be sure to hop over to my blog on Friday and check out the fun that we had. 
If you like these ideas and this freebie, I would love for you to come check me out at my blog.


Ms. Kerri and Her Krazy Kindergarten
Thanks Jeannie for letting me stop by and share a bit!

Spring Color by Number

Well hello there!  I'm Tessa from Tales from Outside the Classroom.  I'm so excited that Jeannie is letting me share some ideas with all of you!

I've been spending a lot of time thinking about math lately.  I am a reading person and have a reading specialist license.  But over the last few months, I've been spending most of my time thinking about math.  I've been trying to brainstorm different ways students can practice math-especially math facts.  I've been creating a ton of games, some spiral review packs, and finally some fun worksheets for students to practice.  I really didn't expect the worksheets to be a big hit, but the ones I created for Easter were HUGE!  Did you see this floating around Pinterest?
After seeing the success of my my color by number activities, I decided to create some additional ones for spring to share with all of you.  These practice addition facts to 20.  There are 3 different pages.  You can download it for free by clicking on one of the images.

  If you like these, come on over to my blog sometime.  New followers are always welcome! :)
Thank you so much to Jeannie for opening up her blog to so many guest posters!

Tessa Maguire is a former reading teacher and differentiated instruction coach.  She currently is in a dual role administration and curriculum coaching position. She spends her days helping her K-3 teachers find what works best for them and their students. She blogs about the resources she finds and creates and she shares tips and strategies for effective instruction.  You can find out more information on her blog Tales from Outside the Classroom http://talesfromoutsidetheclassroom.blogspot.com


Kindergarten Graduation Invitations

Ok. so I am in full END-OF-YEAR mode.....sure we have 5 more weeks of school, but it's never too early to plan for the end, is it? :0)

Anyhoo.....here are some super cute and fun graduation invitations you can send out for the biggest day in kindergarten --besides the whole first day of school!!

I can smell the end coming.....just right around the corner!


Click HERE to grab yours!

I hope you like! If you do please drop me a little line below.....I am hoping to make lots more little end of the year treats! :0)

End of Year Parent Letter

Here is a letter many of you know well.... such a beautiful, sweet letter  --


I slapped some pretty frames around it to use for my parents this year. I usually send home a copy with each child in their PRIDE folder and I read it during our kindergarten graduation ceremony. It is always a parent favorite and there are plenty of tears while I read it..... (the parents even tear up sometimes too :0)

I made a version for boys and a version for hers since I hate reading his/her or he/she....:0)

I hope you like this FREEBIE.....just one of those special end of year things to wrap up this wonderful year!


Need other great end of the year ideas and stuff?? Tessa from Tales from Outside the Classroom is having a cool End of the Year Linky Party. Hop on over and check it out!

Learning to Read Without Letters


Hello! My name is Christina from Sea Bear's Kindergarten. I have been teaching kindergarten for 8 years. Previous to that, I homeschooled my children for 4 years. I am a certified Orton-Gillingham tutor and I am also trained in the Slingerland Method of reading and spelling. I have been contracting myself to schools for the last 11 years. I LOVE helping students that struggle with the reading process realize that though they learn differently, they can do it! I am so excited that Jeannie has graciously allowed me to guest blog to share some of the things I do with the students I work with.

People read words two different ways. Some learn to read by simply memorizing words. Those who are terrific readers and spellers will tell you that they learned how to sound words out and can decode sounds and letters until they form words. So how do you teach someone who struggles to understand sounds to learn how to read or spell?

One of the best ways to teach someone how to read is to teach them how to listen to sounds instead of initially focusing on letters. They can learn to listen to a word and break it into individual sounds. 

 In this picture, the student is verbally given a two-letter word such as "ot". The student is to repeat the word back to you. Then show them how to say the word slowly like a turtle, "o....t". You then ask them to tell you how many sounds they heard in the word. (Hopefully, they will tell you 2...if not, do it again.) Then, using colored items such as the tiles in this picture, show them how to pull toward them 2 different colored tiles to represent the two different sounds they heard. They are to then touch each tile (starting left to right like you read) and make the individual sounds...."o....t". They say /o/ and touch the red tile and say /t/ and touch the blue tile.
This can be done over and over until the student gets the idea that each sound is a separate sound. "Fake" words are used to take the pressure off of a student "knowing" words and trying to work with what they know about known words. Doing this activity with "fake" words will truly show you if the student is growing in this concept.

This activity can be done with three letter words such as "spo" as well. You have to be sure that the child picks a different colored tile for each different sound. You can use tiles or legos or teddy bear counters...anything that is the same size, but different colors. I like to use these plastic tiles because they lay flat and are easy to work with.

If you use words that have two similar letters such as "nin", make sure that the colored tiles match for the letters that match as in this picture.
This activity is always very rewarding. The kinesthetic movement gives them a way to "hold on to" the sounds they are hearing. Eventually, they can be shown how to not only break the sounds apart in the word, but they can also be shown how to move these pieces together and slowly blend them into a readable word. Down the road, the colored tiles can be changed out for ones that have individual letters on them. The lettered tiles can be used the same way the non-lettered tiles are and eventually, the struggling reader looks up into your eyes with the realization that he or she CAN DO IT! 
I have to say that working with struggling readers has been one of my greatest rewards as a teacher. I love showing students that learning can be fun!

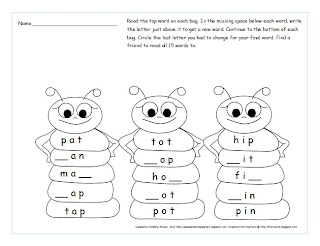
I love to make up fun reading activities for my students. I have created a Kindergarten Lifestyle EXCLUSIVE for you! Click HERE to receive your FREE 2 page reading/writing/spelling activity!

Teaching the struggling reader how to read involves many more steps than the one I shared above. If you like what you saw and want to learn more, please visit my site for more ideas. I would LOVE to hear your feedback on this activity.

Enjoy!


Photobucket

An Eventful Day!!

I was going through pictures....because seriously I feel like I need Hoarders to come out and give me an intervention for taking photos..... I don't hoard physical things, but I am totally addicted to taking pictures.  I take like 300+ photos a week! Anyways, as I was clearing out the photos from my Iphone I came across these snapshots.... Can you guess what it shows?? Any guesses??


A couple of Tuesdays ago we were busy learning -- just minding our own business...in fact we were in the middle of center time and my principal came over the intercom to say that everyone in the portables would be coming into the building because of potential bad weather....but that we should just go about our normal day. Well.... no doubt that signaled every teacher in the building to pick up their phones and check weather. Sure enough - there was a tornado about 5 miles away......

Within a few minutes tornadoes began popping up everywhere (16 official tornados that day - most in Texas' recorded history). We were all instructed to go into the halls and get into "duck and cover" position. These photos were taken nearly 1 1/2 hours later!! (Now before anyone says anything......no this is not "duck and cover") but our 5 and 6 year olds had sat in "duck and cover" for so long they were in tears. They hurt!!! Their legs were numb and they couldn't bear it any longer (poor things). So, we began rotating "duck and cover" with laying flat (still with heads covered). We didn't know what to do so we did what we had to in this awful situation. The lucky ones fell asleep or were dismissed early (we had parents swamping the office).....The unlucky ones we're stuck with us face down for the afternoon. Thankfully we all went home safely!

There were entire neighborhoods destroyed that day, but no deaths. It was amazing! Authorities say the reason there were no deaths in all those destroyed neighborhoods was because kids were at school and parents were at work...... Thank GOD!!!


It was an exhausting day!!! It was a day I will never forget!

Paint Chip Cards for the Word Wall


Ok, so it's uber important to back your word wall words with color - especially those easily confused words. Placing my word wall words on colored backgrounds really helps my kids internalize those words. It helps give kids a mental image of each word. 

My kinders are so good at this they can tell you what color a word wall word is without looking (and of course they are super proud of that ability). The reason they can tell you the color.....and the reason that is awesome is because they are seeing that word in their mind's eye. They not only remember that color, but the other features of that particular word. The color is a hook in their mind to hang that word --making kids less likely to forget it!


Now, on to the point of this post....... For years I've used construction paper and/or colored copy paper to back my words. The colors are good, but throughout the year, the colors begin to fade and just look yucky!! So, each year I am making new word wall word cards for my word wall. Well.... this just gets plain OLD!!!

I've seen tons of great ideas on Pinterest about how to use the paint chip cards for various things. This got me thinking..... Can I use paint chip cards to back my words????

So....I gave it a try..............AND ............IT works beautifully!!! Woo-hoo!! I love when something free works out the way I intend!!

I chose particularly bright cards (2-3 of each color). Any word that begins with the same letter must be a different color.... And, words that are easily confused must be backed with a different color ("am" and "me")......

I hope you like this tip! I am so proud of my new word wall word cards!! ...........now maybe I won't have to redo them again next year....:0)

The "Kindergarten" Writing Process

I am very excited to be a guest blogger here on Kindergarten Lifestyle. I love Jeannie's blog and I think the concept of guest blogging is fantastic, as it gives bloggers an opportunity to share their ideas and activities with a bigger audience. I enjoy talking, whether it is face-to-face or through blogging, and I love knowing that people are interested in what I have to say. I hope that you enjoy my post today. I will be sharing photos of my writing classroom and I will include explanations of what I do and how I utilize the many charts and displays in my classroom. I am a writing specialist for kindergarten, first grade, and second grade, so it is imperative that I have a print rich classroom, full of meaningful learning displays. I also teach grammar, science, and social studies.

The first picture I will show is my 6 traits of good writing and writing process bulletin board.


Every day, during writing workshop, my students are all in different places in the writing process. I like for my students to know that there is no beginning or ending to the writing process. That is why I hung the posters with arrows. The arrows show that they just keep going around and around. I try to focus on a different trait of good writing each week, so I hung my 6 traits posters in the middle of the board. Writing workshop in my classroom always begins with a mini-lesson from me or from one of my students who has done something wonderful the day before. My students love to be teachers and the children always listen nicely when they are in charge. Then, they do a turn and talk, where they discuss what they are going to be working on for the day. This really helps them get focused and ready. Next, is my favorite part of writing workshop, the quiet 10. This is where everyone, including myself, is writing. There is no talking, no moving around, no distractions. The lights go low and soft music plays in the background. It's very cozy and conducive to great writing. I have a writing topics display hanging for children to get ideas if they cannot think of anything to write about. If they need ideas, they must get the card(s) before the quiet 10 begins.


After the quiet 10, we spend the next 20 minutes writing and conferencing. The children sign up for conferences with me if they want to, but they cannot come to me until they have shared their story with a friend or two. This helps them to find and correct errors before they get to me. Finally, we spend about 10 minutes sharing. The children have to sign up to share and they cannot get another turn until everyone has had a turn. 

To help my students become the best writers they can, I have several displays in my classroom that they can refer to whenever they want. This is my "Types of Leads" display, which they helped to create. The children worked in groups to write a specific lead and that is what they use to remind themselves how to write each of the leads I taught them.


I also have a display that shows some good transition words for them to use in their stories. Each color displays words to use for the beginning, middle, and end of their story. Even my kindergartners use this display.


The next chart is one of the most useful charts I have hanging because it encourages my writers to write more in-depth pieces. If they show me a piece that leaves out crucial information, I take them to this chart and ask them to answer Who, What, Why, etc. If they cannot, they know that they need to go back and add in some information so the reader is not left confused and wondering what is going on in the story.


I also have a chart that shows the children how to write a super sentence. I have them refer to this chart whenever they have a sentence that needs a little more information.


My word wall is an important part of my classroom and my students and I refer to it quite often. That is why it is big and bright and spans one and a half walls in my room. It is color coded, too. All kindergarten words are in red, first grade words are in yellow, second grade words are in green, and words frequently used in writing are in orange. My younger students love to boast that they can spell words from higher grades correctly and I sometimes point out to my second graders that they are misspelling words that they learned in kindergarten.


Here is a picture of what I call "The Menu". When my students are done with their station work, they can choose many different activities to do that all involve writing. Here, they can choose something from the menu to work on.


They can also choose to complete an activity from the pocket chart. Here, they will find word searches, word wall activity sheets, stationary for writing letters, secret code spelling, and much, much more.


Wow! This post is even longer than I thought it would be!  I better stop talking! Before I go, though, as a gift to you for being such good listeners and reading this l-o-n-g post, I will share my transition words poster with you. Just click the picture below.


As you can see, I absolutely love to share my ideas and activities. I truly thank Jeannie for giving me the opportunity to expand my group of followers. If you do not already follow my blog, I would love it if you would click on over and join me.


Again, thank you so much for joining me today and I hope to see you as a regular at Teaching With Love and Laughter.


Developing Writing Skills in Kindergarten

Hello Everyone!
I'm Kelly from Kindergarten Kel. First, let me say how excited and honored I am to be a guest blogger here at Kindergarten Lifestyle. Thank you, Jeannie, for this very special opportunity!

Writing is one of my very favorite subjects to teach in kindergarten because of the huge amount of growth shown by each student throughout the school year. I also love teaching writing because it is so easily adaptable to different themes, topics, and ability levels!

For this post, I'll do a picture walk through some of the ways I encourage my young learners to become writers and really enjoy it. I can't take credit for these ideas, as most of them have been shared with me by my wonderful co-workers! Hopefully you connect with some of these ideas and can adapt them to fit the needs of your own classroom, even if you don't teach kindergarten.

ABC Books
We start our alphabet books at the beginning of the year and do 1-2 letters per week. I like to introduce the whole alphabet within the first few weeks of school, and then review each letter throughout the year, placing an increased emphasis on printing the letter neatly later on. On each page of this book, students sound spell two words that begin with the letter of the week, draw a corresponding picture, and print both the uppercase and lowercase version of the letter. When they are through with the page, they color in the letter box on the cover of the book. This is great writing practice for students who are easily overwhelmed by writing longer pieces of writing, and reinforces beginning sounds.

Write the Room/Rainbow Writing

Along with our ABC Book, I have students do a Write-the-Room and Rainbow Writing page for every letter of the week. I copy these activities front to back, and they work perfectly as an easy center activity. It helps reinforce beginning sounds, increases students' awareness of environmental print in our classroom, and is good handwriting practice for every student, especially those who struggle with their fine motor skills. Click here to get the rainbow writing pack from my TpT store for only $1.95!

Journals
I have tried many different versions of kindergarten journals, but these primary composition books are definitely my favorite. I think we ordered them from Lakeshore Learning this year. They hold up very well and each page has a space for a picture and writing. When I first introduce journals, I like to make a huge deal about how cool and grown up they are. We talk in detail about proper journal care. I have students start out by writing sentences using our sight words of the week during our writing time. After winter break, students progress to doing more open-ended, creative writing in their journals. It is usually one of their academic choices during quiet time. Sometimes I give them a journal prompt based on a theme, but often I let them "free write".

Parent Journals
Yay! My very FAVORITE writing activity that I use in my classroom is parent is parent journals. They are SO motivating, even for your most reluctant writers. Here's how they work: Students write a journal entry to their parents on Thursday. They bring their parent journal home for the weekend. Parents, grandparents, siblings, or other special people write back to the children. Students bring the journals back to school on Monday and I read what their parent has written to them! The students just love it. A key to making sure parent journals work in your classroom is to wait until your parent meeting night or first conference to explain them directly to the parents. They can be tricky for ELL families to understand and participate in, but I find that overall, they can be a positive writing tool for students.
Assessments
Here are two of the quarterly writing assessments I use to help me gauge what stage of writing the children are at, and how they are doing with writing sight words.

"Words I Know" (Sometimes this is also known as "Word Splash")
Students simply write down every word they know how to write conventionally.
You can see the different abilities of my current students in this comparison photo. One student wrote with the page upside down--red flag!

"Stages of Writing"-Jack and Jill
Students write the words to the nursery rhyme "Jack and Jill". This helps me easily compare writing conventions and sound spelling among different students and shows a neat progression of writing growth from quarter to quarter.
Of course, this is just a small sampling of the writing activities that my class does throughout the year. I hope that you find some of these ideas adaptable for your classroom!

Come over and visit me at KindergartenKel for more ideas- plus I have a Target gift card giveaway going on that ends tomorrow night!

Adorable Classroom ABC Photo Book

Salutations! This is Maria from Kinder-Craze and I am so THRILLED to be guest blogging on Kindergarten Lifestyle. I am also super-excited about my newest creation for the classroom so I'd better hop to it and share my idea before my enthusiasm causes me to burst!
 
Last week I made what may very well be the coolest book in my classroom library. It's an Alphabet book and it's all about my students.  I had a coupon from Shutterfly for a free 8"x8" hardcover photo book and I couldn't let it go to waste. So, I put on my creative hat, settled in with my laptop, and went to it!

 Itty Bitty Sample Pages from My Alphabet Book
(I wish you could see it full-size, but I gotta protect my kiddos' privacy)

Shutterfly offers two choices for book creation: Simple Path and Custom Path. Simple path does all the work of page layouts for you. Custom Path allows to to customize each detail of the book: page background, photo size, tilt angle of photos, caption size, caption font, caption color, etc.  I wanted my book to be "just so," which of course meant that I chose Custom Path. It took FOREVER but was so worth it!

A few details about my book: I started by making sure each student was featured for whatever letter their first name starts with, then I sprinkled in a few other words for concrete objects from other favorite photos in my collection (ball, snow, hundred, girls, boys, etc.) I had to get a little creative for the tricky letters. Here are some specific examples:

O- Opening Presents - I used a photo of students opening gifts during our class Christmas party.

U- Upside Down - I found a fun picture of the whole class then rotated the photo and caption so they were upside down.

X- Fortunately, I have a student named Max this year. Since his name ends with an x, he was featured in the X page instead of the M page.

Y- Yummie- for this one, I just added a photo of a student eating one of our many treats from the year.

Z- Zany- On the first day of school I took 2 photos of each child. One was a typical smiling picture and the other was a silly photo. On the zany page, I added all of the silly pictures from the first day. It was adorable! This is definitely a great way to end the book with a bang!


I received our Shutterfly alphabet book just in time for conferences. Parents could flip through the book while they waited to conference and it has been a hit! The best part is that Shutterfly allows you to share a completed digital book with others, so parents have an opportunity to go online and purchase their own hard copy as a fun kindergarten keepsake.

I know, by now you're thinking "Holy Cow, that book was free?!?!?!" Well, to be honest. It was sort of free. The basic hardcover book was free, but I had to add a few extra pages to fit the whole alphabet in. Those pages cost me, and so did shipping. When it was all said and done, I paid about $15.00, but compared to to the original price of $30 for a hardcover book, plus additional page costs, plus shipping, it was a bargain!


A GREAT BIG thank you goes out to Jeannie for generously allowing me to guest-blog for her today! My blog, Kinder-Craze, is relatively new but I'm pouring great new ideas into it all the time. I hope you'll pop by to see it. In addition to the usual lesson plan and project ideas, I have some fun uses of technology in my classroom that I am hoping to blog about soon!