


Hey friends!
Today I'm linking up with a couple Freebielicious Friends (Crystal and Tammy) and I so excited. I adore this book and have already used it for a couple years. When we were discussing which book to study this summer, this one stuck out above the rest.
So, let's get straight to it!!
Chapter 1 is a critical chapter -- it's all about MANAGEMENT....time management, behavior management, materials management.... As teachers we know if these things aren't in place - NOTHING constructive is going on during guided reading....or any other time of the day. You cannot skip something as important as establishing routines and expectations in hopes it will "all fall into place" - IT WON'T! You can't speed through those first few weeks "because you got to get to the curriculum". We know that you can have the best curriculum in the world......and it won't matter if the kids aren't accustomed to classroom routines and expectations.
Week 1:
That first week is all about building a community. Have the kiddos practice sharing, working together, and resolving minor conflicts (hopefully there's not too many yet).... You will NEVER be able to conduct meaningful guided reading groups if the others can't work by themselves and with classmates.
Center activities should include: puzzles, math manipulatives, playdough, coloring sheets, blocks. Notice the emphasis here is not on academics, but simply working together. That is the cornerstone of an effective/productive classroom.
*What does that look like?
*What does that sounds like?
*What does that feel like?
All kids need this spelled out for them - and kinder kids even more so. You cannot assume the understand what you mean by share, or use these materials appropriately. Far too often they do not. The need opportunities to practice these vital, yet often over-looked skills. They HAVE to be able to do this in order to work together later on. DO NOT go on until they can carry on like civilized humans. :)
During the first weeks on school, our entire center/guided reading time revolves around doing "table centers". "Table centers" are not literacy based. They are play based....using materials we will use throughout the year.
Take a look at some of my "table centers" HERE. Notice that, by "table centers", I literally mean "table centers". I use buckets of materials (legos, pipes, blocks, unifix cubes, puzzles, etc.) Each table gets a bucket of materials and that is their center. I literally teach, "This is what you can do with the legos. This is what you cannot do with the legos." - SPELL it out for them!
In the beginning I rotate centers every 10 minutes. I physically pick up the bucket of materials and move it to the next table (so kids can see the process of rotating). I'm still doing it at this point - not them. I want them concentrating on using and sharing the materials AND cleaning up the materials. I switch.
Week 2:
Slowly begin to teach a literacy center to one group at a time while other groups are still doing table centers. If you have stationary play centers that you use (like home, blocks, sandtable) start with those first. Other centers like big books, and retelling are some of my last centers to introduce. I want the kids to have multiple opportunities to see how we use the materials for these centers in whole group teaching before they have a "go at it".
Focus on going slow now so you can speed up later. You are laying a critical foundation for the entire year. Teach one literacy center each day to a different group until all groups have learned and practiced the center. So you will introduce 1 to 2 new centers per week. Remember - going slow to speed up later. You won't regret it!
Week 3:
Slowly add in a second or third center. You will have the first center up and running, teaching and practicing the second center. All other groups will still be doing table centers -- still working on sharing, taking turns, etc.
Week 4 and 5:
Continue adding in a center...or perhaps 2 centers per week. Introduce the center management system.
Week 6:
By now, all students are working in a literacy center/workstation. Table centers are a thing of the past! When we are done with table centers, mine go in a cabinet that will become our "inside recess" cabinet during the winter-time. The kids will already know how to use the materials AND they will be excited to use them again come winter-time!


Here are some of the center cards and signs I have for sell if you are looking for some :)

(Bright Bubbles - HERE)
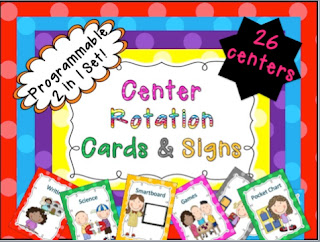
(Polka Dots - HERE)

(Zebra Stripes - HERE)

(Chevrons - HERE)

(Animal Print - HERE)
Another good question is, "What do I do when a student approaches the guided reading table?"
The fact is this goes right back to establishing routines and expectations from the very beginning. If you lay down the ground rules, few young children will try to cross the line. Kindergarten kids in particular are just people pleasers. They want to do the right thing and they want you to be proud of them. Be specific about what they can AND can not do. Model it, role play it. Let the kids know when they can interrupt your group. I use the 3 B's.
They can interrupt my guided reading group if they have a 'B' emergency!
*broken (bones I mean - you never know....)
*bleeding (and no not a scratch....I have to see the blood come out on its own)
*barf (this always sticks in their brains -- you can't continue teaching a guided reading group if you got a "barfer".....eewww!!!! :)
Now kids will forget these rules (especially until they are ingrained).... If one approaches, what do you do? IGNORE!!!!!! Do not talk to that little munchkin! I put my hand up like a stop sign and IGNORE them. If that doesn't work, I pull out the old "pit bull look" ....like I'm going to bite your leg off if you come any closer.......that look usually works for me! :)
Time Management is also a critical piece to using guided reading groups effectively and efficiently. I tend to be long-winded (can you tell?).... I do a couple of things to keep me on target with time.
I use music during guided reading time -- yes where everyone can hear it. And when I have a playlist all set in my computer, it NEVER changes for the whole entire year. Kids quickly learn those songs and can tell when it's almost clean up time. They will be ready to tidy up before you! I always love to use Dr. Jean's Nursery Rhyme CD (about 20 minutes worth) for my center time. It's a great way to practice those nursery rhymes while also helping kids learn how to listen to their internal clocks.
I also use a visu-timer like this one:
YOUR TURN: What tips and tricks do you have for guided reading time?

Love the video of the girls changing the center cards. Please tell me the rest of your class was outside or something! It was so quiet. :)) I will say that I have done my math centers this way, putting out table centers and introducing one math center a day. It works great! Not sure why I didn't do this for REading, but I will this year. :) Thanks!!
ReplyDeleteI am loving this book! I love your idea of using a cd for center time. I will be borrowing this idea for sure!
ReplyDeleteThanks for the great insights! During guided reading I wear a crown, which signals to students that I can't be interrupted. I start wearing this crown after about a month of school goes by. Since I teach four year olds I only wear it for about ten minutes, then I take it off and walk around the room. We also have an anchor chart that reminds students of their options when I'm busy. Can't wait to get my hands on this book (it's making it's slow progress in the mail!)
ReplyDelete~Jessica
Fun in PreK-1 is Having a Giveaway!
Wonderful! I love your ideas. I especially like that your groups begin with play based activities. So many people forget that play is part of learning. They are children and need play time and social learning time. When you mix the two wonderful things happen. I also like how slow you go with your introduction of routines. Good job!
ReplyDeleteOkay... I do work stations very similar to you, but I was wondering what the number was next to the center label on the chart? I find my kiddos working in pairs is ideal, and it keeps my ability to work in small groups to a maximum! :) I'd love to hear more! :)
ReplyDeleteKim
Carried Away in... K!
I haven't read the book, but after your review, it sounds like a terrific book! I love your idea about using the same music every day to keep time during your centers. Thanks for sharing.
ReplyDeleteKelly
I'm Not Your Grandpa, I'm Your Teacher
Love your ideas! I love the hello my name is. What a great idea to link their photo with their picture at the beginning of the year.
ReplyDeleteI have my kids create their name with magnetic letters on a cookie sheet. It goes with Chica Chica Boom Boom which I read first. Then I take their picture holding the cookie sheet in front of them. I use the pictures for center rotations.
DeleteI love your ideas! What a wonderful way to address literacy with name recognition with the Hello my name is sign. Also a fun way for kids to know each others name.
ReplyDeleteI love this book also. I do use work centers in my classroom but I slowly introduce them in the third week of school once they have learned some of the rules and expectations.
I love this book! I have used it for a year or so. I also start out by introducing centers slowly but I am the one that tends to want them all up & running quicker then they should be! Lol I need to slow down! I was wondering what order you introduce your centers in? I just like to compare to what I'm doing and see if there is a better way! Thanks!
ReplyDeleteWhere can I order your center management pocket chart?
ReplyDeleteI read Next Step a year ago and then followed with Daily 5. When introducing reading workshops this past year, I introduced play centers first and then added in the "Daily 4"! I also used music to signal transitions. We did a timed rotation this past year rather than choice. Couldn't quite get there with my K5. The kids rotated on 10 minutes. I kept my Guided Reading Groups for 20 minutes (through 2 rotations). So I set up a playlist of 10 minutes of silence followed by a clean-up song. I alternated quiet clean-up with a bouncier clean-up so that the in between wouldn't really disturb my Group. I need it very quiet or I'm distracted. I enjoyed reading your post on beginning the year and totally agree with your points. This is such a practical book!
ReplyDeleteChayaphillips - I bought the pocket chart with Debbie Diller's package at Really Good Stuff. It cost me $50 (well cost the school). Personally if I had to do over I would have continued to use a regular pocket chart -- I used to use a regular one and it worked just as fine.....
ReplyDeleteI am definitely getting this book! Loved your ideas and how you explained them...very easy to understand. I do my morning centers in a similar fashion. I have 2 manipulative centers, a craft center, and a literacy center(which I run). It really helps to do my teaching in small groups with the prek students. I have 4 to 6 students in a center, depending on the year...
ReplyDeletethanks for sharing!
2preschoolpals
Hi! I would like to echo Mrs. Davis's comment. I love the way you organize your centers, but what are the numbers next to the centers for? :)
ReplyDeleteGreat ideas for getting started at the beginning of the year. These are the kinds of things we just don't learn in college!
Hi Mrs. Partin- you mentioned above that the pocket chart from Really Good Stuff and was a bit expensive; I would love to have a pocket chart like that for center rotations- what is another pocket chart and size that you would recommend? Also, what are the numbers for next to the station cards for? Thanks for all your great items and tips!
ReplyDelete