


Hello there! It's Michelle Griffo from Apples and ABC's guest blogging here!

I am so excited to be sharing a fun idea with you on Kindergarten Lifestyle! I want to show you a creative way to display student work without having to use a bulletin board! I only have 3 bulletin boards in my classroom, so I made mini cork boards to clip student's work onto. I stuck these onto my cupboards with 3M Tape, and then I can constantly be showing off writing, without using my precious wall space!
Here is the finished product of what the mini cork boards look like on my cupboards. I used push pins and small binder clips to hold up their writing onto the cork board!

Here is how I made these little gems... they lasted all year long, and I know I will be able to use them next year too. I'll show you step by step, so you can make them too!
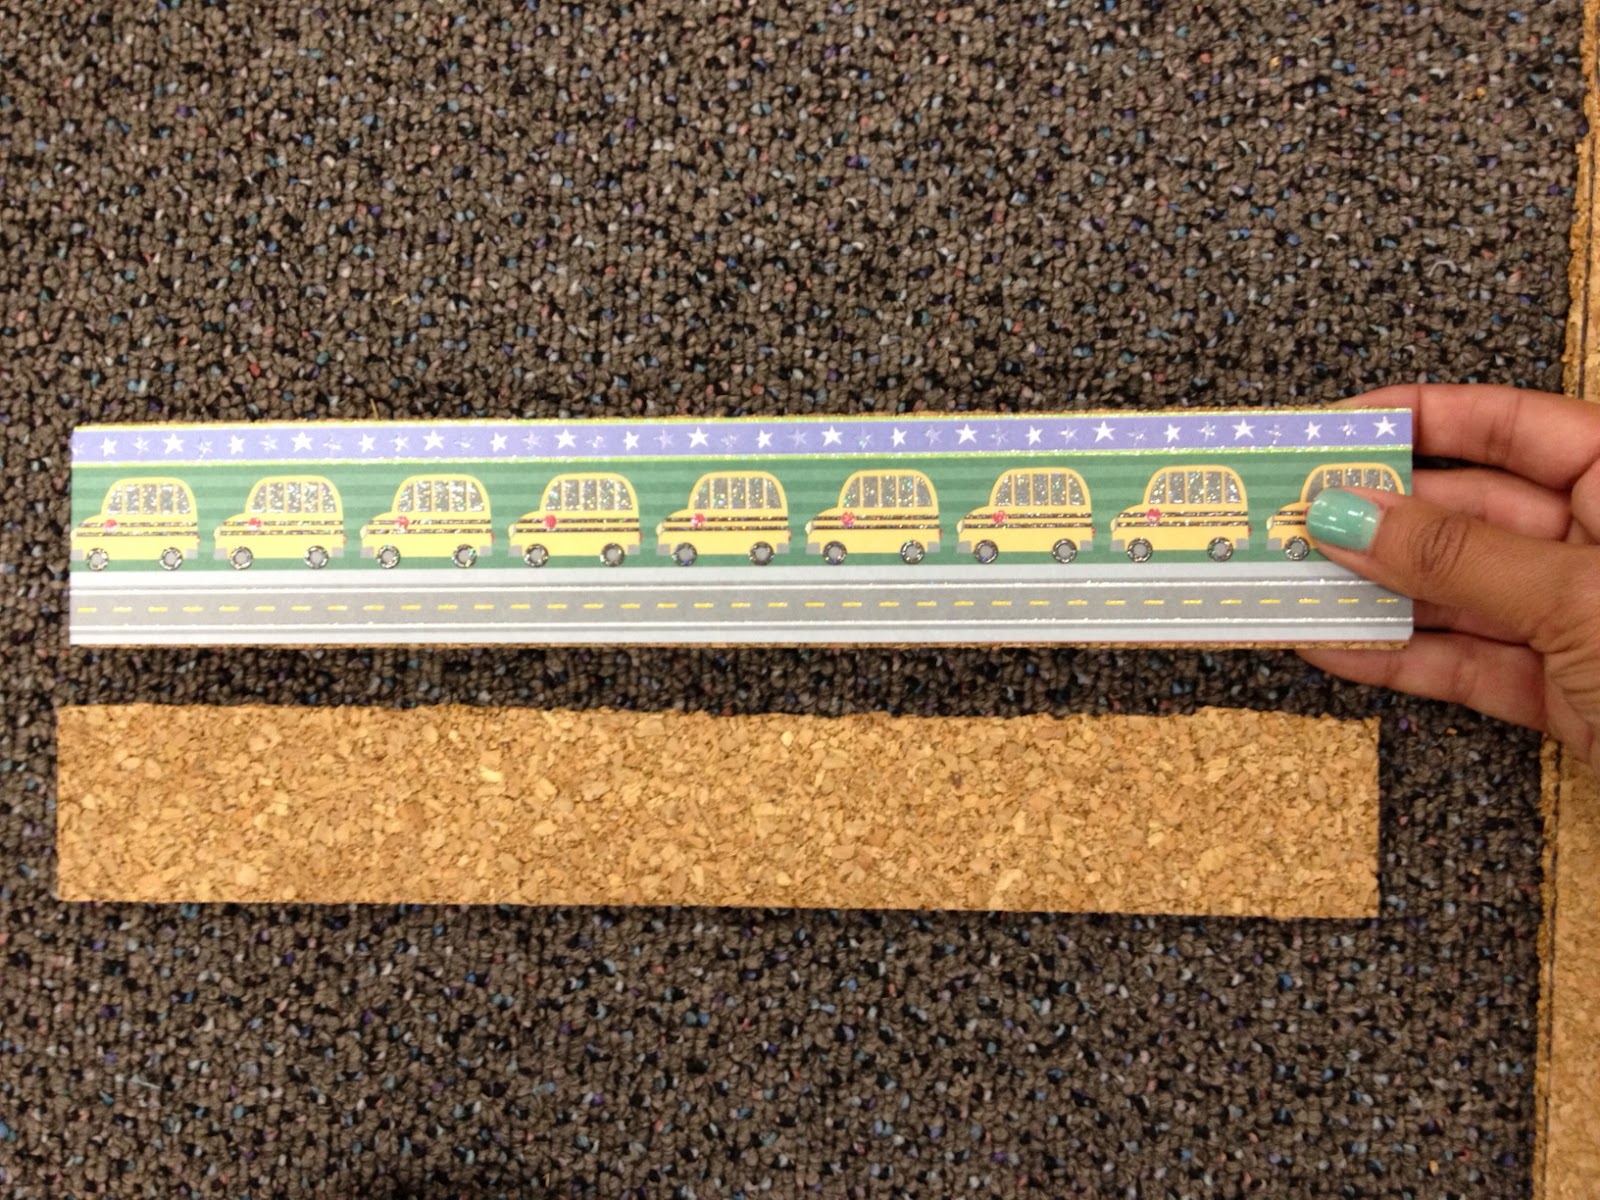
I started by finding cute scrap booking paper that would be great to use in the classroom! I chose to a school bus and apple print so I could keep the paper up year-round.

After the cute scrap book paper was picked out, there were a couple of other items that I needed: scissors, ruler, and most importantly, cork board. I bought this square at Target (you can get it at any place that has an office supply area, and they come in a 4 pack).

First, I used the ruler to mark out how thick I wanted my mini cork board to be. I made them about 3 inches thick so you could still see the cute scrap book paper when the student's writing was hanging up!


Once I made my line, then I cut the piece off. It actually works better if you use a razor of sorts, instead of scissors, it makes a cleaner cut!


The next step was to cut a 3 inch strip of scrap book paper and glue it to the top of the cork board. I used a hot glue gun to make sure that puppy stayed for good!

Now, I added two extra squares to the back of the cork board strip because I found that the push pins I used were much longer than the thickness of the cork. So I cut out two squares and added them to the back where the push pins would go...


Once I made them, I hung them on the cupboards with 3M Tape and we were ready to go! One thing I liked about these, is that I kept layering each writing assignment on top of the other. That way, parents could flip through and see samples of their student's writing from the whole year. It was like having a portfolio on display year round. This would also be helpful to show the stages of writing, using thinking maps, rough draft, all the way to the final draft!

I hope you enjoyed this post, and I am so happy that Jeannie had me as a guest blogger! Please come by and visit me at Apples and ABC's! :)
-Michelle Griffo

Love this idea! Thanks for sharing.
ReplyDeleteMichele
I think this is exactly what I'm looking for to solve my lack of work space problem!! Thanks for sharing!!
ReplyDeleteLisa
Learning Is Something to Treasure
What a beautiful way to display kids' work Michele!! I love this idea!
ReplyDeleteGreat idea! I might need to do this for next year!
ReplyDelete❤Teri
A Cupcake for the Teacher
WEEEE thank you for having me! :)
ReplyDeleteMichelleApples and ABC's
I love this idea. Since I only have one BB in my classroom so I have to use part of my magnetic white board as a BB this will be a great option with some heavy duty magnets on the back.
ReplyDeleteLove this! What a great and soooo CUTE!
ReplyDeleteCrystal
Teaching Little Miracles
Ooops...that should be:
ReplyDelete...What a great idea...
Crystal
Teaching Little Miracles
This is a really great idea!!! Thanks for sharing the step by step directions on how to make them.
ReplyDeleteConnie:)
www.welcometofirstgraderoom5.blogspot.com
Michelle this is such a cute idea!!
ReplyDeleteBlessings,
Jessica Stanford
Mrs. Stanford's Class Blog
PS If you haven't already joined my giveaway I would love to have you join!
What a GREAT idea! Thanks for sharing!
ReplyDeleteKim
Growing Up Teaching
Great idea! We are getting lockers soon, so this will be perfect! Thanks for sharing!!
ReplyDeleteRobynn
BusyBees
Oh my word, sooo cute Michelle!!!
ReplyDeleteThis is really cute!! I think I may have to make these to replace my clothespins!! Thanks for sharing!!
ReplyDeleteI love these mini corkboard displays! What a great idea!!
ReplyDeleteThis is super cute!!! I don't have very many b. boards either. This is great! I just started hosting a weekly linky called Made It Monday where you link what you have made for your classroom. I would love it if you would link up:) Then you can check out the other links. Lots of fun ideas:) I can't wait until next Monday:)
ReplyDelete4th Grade Frolics
This is way to cute that I will be doing in my own classroom. Thanks
ReplyDeleteInstead of using clips, you could also use clothes pins.. Might be easier to handle.
ReplyDeleteYou might want to use clothes pins instead of clips. Might be easier to handle.
ReplyDeleteThis idea is amazing! I am on my way to the store to get all the supplies. Thank you for sharing!
ReplyDeleteThanks for sharing this idea. I love that I can customize the paper to fit my classroom theme.
ReplyDeleteStacy
Simpson Superstars
Great idea for all grade levels. One question, what kind of 3M tape do you use to hang them?
ReplyDeleteThis is so cute! I am absolutely doing this. I may include the student's name on it, too.
ReplyDeleteLOVE IT!
Vanessa
Kindergarten Schmindergarten
Just finished making mine! Thank you!! What kind of 3M tape did you use? Any problems with them falling off when you open cupboards?? Thanks for sharing. :)
ReplyDeleteAdorable! Love the space saving idea!
ReplyDeleteOMG! love, love, love this! And thanks for including the idea of using it to save work samples. We're required to pass along writing papers to the next grade, so this will not only help with my limited wall space issues but my keeping up with student papers as well.
ReplyDeleteLove it!!!! I will definitely be borrowing your idea :).
ReplyDeleteI love this idea! Thanks for sharing. I will definitely be making these. I have the same question many other have--what kind of 3M tape do you use? Does it come off if needed? For instance, if I move to another classroom?
ReplyDeleteLove this!!! My next project for back to school.
ReplyDeleteThanks for sharing and all the DIY steps.
Tonia
Mrsvento.blogspot
I am not a teacher, but I love to look at K and 1st grade teacher blogs; you are a creative bunch. I wanted to let you know that I am going to copy your idea, with a little tweak. I intend to give them as stocking stuffers to my family to use on kitchen cupboards to hold a recipe!! I think it would be fabulous! So many of us print recipes off the internet and the clips would be great holders. I also may make one as a memo holder for my family. I am always leaving notes taped to the microwave to let them know where I am, when I'll be back, what is planned for dinner... Thanks so much for the inspiration!!
ReplyDeleteJust bought my cork board and red polka dot paper -- this is my next project. Thanks! Do you think I could use a glue gun to attach it to the cupboard?
ReplyDeleteGreat idea for my tiny classroom! Please let us know what kind of 3M tape you used!
ReplyDeleteGreat idea! I think it would look cute if you painted the corkboard as an alternative to using the paper. You could add polka dots or the like...whatever your crafty heart desires. You could also attach magnetic strips to the back and use these to attach to metal divider walls or even to a filing cabinet! Also, I discovered Mavalus tape this year and it is awesome. Nothing will fall down if you use this tape. I bought it at a local teacher supply store here in Toronto.
ReplyDeleteLove this!! I'll be getting my cork board soon!! Thank you for sharing!!
ReplyDeleteOh my heck I L.O.V.E. this idea!!!!
ReplyDeleteAmy
Where Seconds Count
What a great idea!!! How many strips can you get out of one cork board?
ReplyDeleteCan't wait to make these this year
How did this work out this year? I use clothes pins with fun cutouts hotglued on them.
ReplyDeletegreat idea - thanks for sharing - I am moving to a room next year that have very little bulletin board space - this is a great way to share their work! Thanks!!
ReplyDeleteThanks for sharing such a great idea. I am moving to a new classroom next year that has very few bulletin boards -this will be a great alternative - thanks for sharing!! Jean
ReplyDeletegreat idea - thanks for sharing - I am moving to a room next year that have very little bulletin board space - this is a great way to share their work! Thanks!!
ReplyDelete